
Materials and Pattern Choices
Choosing materials starts with the pattern’s stated yarn, gauge, needle size, and size range; these details work together rather than serving as interchangeable suggestions. Hand Knitting Guide is an independent English-language information guide for practical knitting decisions. Before buying yarn or tools, check that the pattern gives quantities and measurements for the size you plan to make. The notes below explain how to read those specifications and compare common fiber choices.
Yarn and gauge
Read the yarn requirements before choosing a substitute: a mitten pattern may specify a weight such as fingering, DK, or worsted, along with a fiber content or named yarn. Yarn-weight names are useful starting points, but the pattern’s stated gauge is the deciding specification. Check the ball band for fiber content, length, and care instructions, and compare length in yards or metres rather than relying on the number of balls alone.
| Pattern detail | What to check | How it affects the choice |
|---|---|---|
| Yarn weight | Terms such as fingering, DK, or worsted | Choose the stated weight first; a substitute with the same label still needs to suit the pattern gauge. |
| Fiber and care | Fiber percentages, such as 100% wool or a wool blend, plus the ball-band care symbols | Wool often has more natural spring than cotton; care varies, and some wool yarns require hand washing. Cotton is generally less elastic and can feel firmer in a close-knit fabric. Acrylic is often smooth and may be machine washable when its label permits. |
| Yardage | Pattern quantity for the selected size in yd or m; ball-band length per ball | Compare total length, not just ball count, and check whether the pattern lists separate quantities for each size. |
| Gauge and size | Stitches and rows over the stated area, commonly 10 cm (4 in), and the pattern’s size measurements | For example, 20 stitches over 10 cm (4 in) is a target only if that is what the pattern specifies. The listed size measurements indicate which finished dimensions the pattern is designed to produce. |
Fiber also changes how the yarn feels while knitting and how it behaves after washing. Wool can feel springy, while cotton has less bounce; blends combine properties, so read the percentages rather than assuming every blend handles alike.
When comparing two yarns, check both the gauge and the care label against the pattern. A matching weight name alone does not establish that the yarn will produce the same fabric or be cared for in the same way.
Needles and notions
Use the needle type and size named in the pattern as your starting point, and check whether the size is given in millimetres, US sizes, or both. For knitting mittens in the round, patterns commonly call for double-pointed needles, a short circular needle, or a long circular needle used with the magic-loop method. These methods differ in how stitches are held; follow the pattern’s chosen setup rather than switching needle types without checking that the required circumference can be worked.
Needle material can affect handling: metal needles have a smooth surface, while bamboo or wood often provides more grip. The exact size still matters more than the material, since needle diameter affects stitch size. A US size 2 needle is 2.75 mm, but use the measurement printed in your pattern if two sizing systems appear.
Keep a few small notions nearby. Stitch markers identify round beginnings or marked points, a tapestry needle is used to thread yarn through stitches and weave in ends, and waste yarn can temporarily hold stitches. A flexible measuring tape helps check dimensions against the pattern’s size chart. Choose markers that fit comfortably on the needle and waste yarn that is smooth enough to remove without snagging.
Preparing for the Mitten
Before casting on, confirm how the pattern defines its sizes and which measurements it uses. Compare the stated finished dimensions with measurements taken from the hand you plan to fit. Check the pattern’s construction method, including whether it is worked flat or in the round and how the thumb is formed. A measured swatch helps verify that your fabric will match the pattern gauge before you begin.
Check the pattern and measurements
Use the pattern’s finished dimensions rather than relying on a label such as small or medium; sizes vary between designers. Measure the hand you are making the mitten for and compare each measurement with the pattern’s sizing notes or schematic.
- Measure palm circumference around the widest part of the hand, just below the knuckles, with the thumb excluded and the tape held comfortably without compressing the skin.
- Measure hand length from the wrist crease to the tip of the longest finger, then compare it with the pattern’s stated hand length or finished mitten length.
- Locate the thumb crotch, where the thumb joins the palm, and measure from the wrist crease to that point to check where the pattern begins its thumb shaping.
- Compare your palm circumference with the finished circumference given for each size; use the pattern’s fit notes to judge whether its intended ease suits your preference.
- Check any schematic dimensions for the hand and thumb opening, since a close circumference match alone may not suit a longer hand or differently placed thumb.
- Confirm whether the instructions use a thumb gusset, a set-aside opening, or another construction method; follow the pattern for cast-on counts and all dimensions.
If your measurements fall between sizes, use the finished measurements and the pattern’s stated fit rather than automatically choosing the larger size. Keep the palm, length, and thumb-placement measurements together so you can refer to them as you follow the instructions.
Make and assess a gauge swatch
Work a swatch in the pattern stitch before beginning the mitten, using the same stitch pattern and working method specified by the instructions. Measure the fabric itself rather than estimating gauge from the needle size.
- Cast on enough stitches to make a swatch wider than the 10 cm (4 in) gauge area, leaving room to measure well away from the edges.
- Work the stitch pattern for enough rows to create a substantial sample; include any pattern texture that changes the fabric’s stitch or row density.
- If the mittens are knitted in the round, make the swatch in the round or use a method that carries the yarn across the back, since purling back can alter tension.
- Finish the swatch as the pattern recommends, then let it lie flat and dry before measuring; do not stretch or pin it to force a particular size.
- Place a ruler across the center and count stitches within 10 cm (4 in); avoid the cast-on edge and selvedges, where stitches can be distorted.
- Compare both stitch and row counts with the pattern gauge; if you have too many stitches, try a larger needle, and if too few, try a smaller one.
Make and measure another swatch after changing needle size, because even a small gauge difference changes the finished circumference. Begin only when the measured fabric is close to the pattern gauge, especially if row counts control the hand length or thumb position.
Knitting the Cuff and Hand
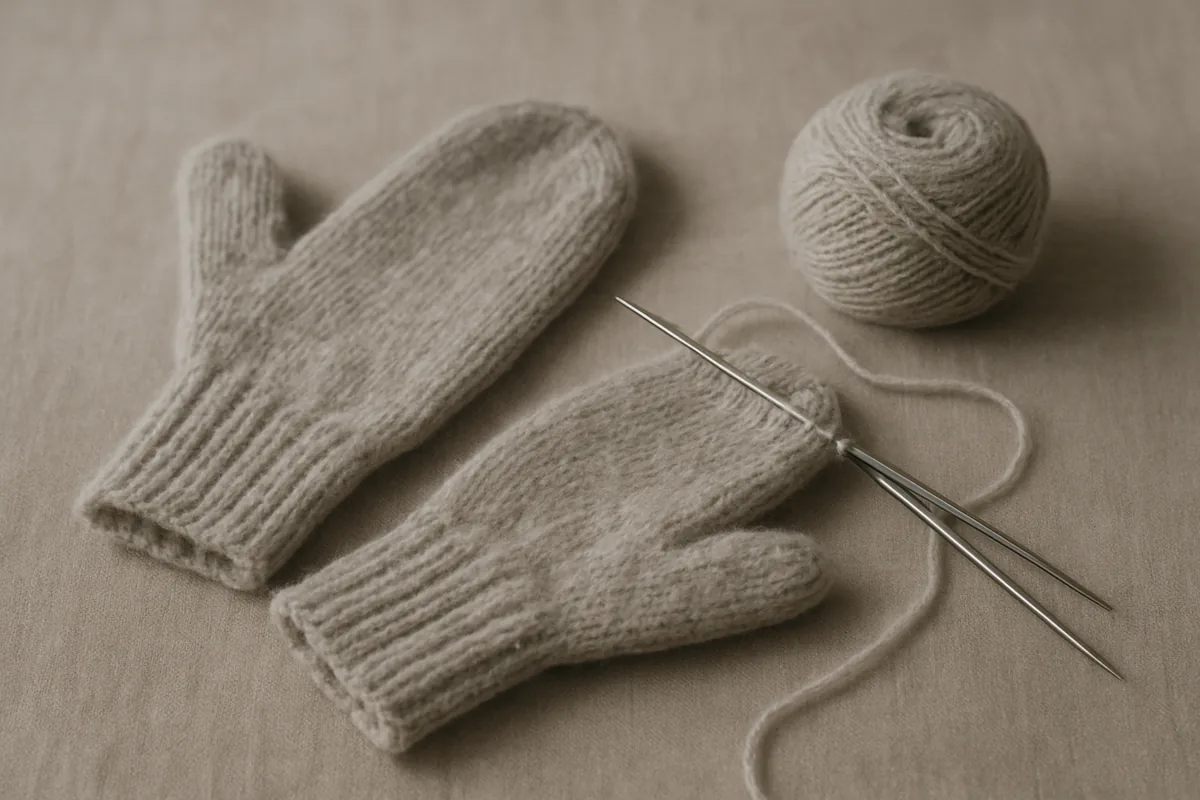
The cuff establishes the mitten’s opening, while the hand section builds from the wrist toward the fingertips. Follow the pattern’s sequence for casting on, working the cuff, and moving into the hand rather than adding or removing stitches on your own. When knitting mittens in the round, the join and round marker help keep the fabric continuous and make round tracking easier. Keep the pattern’s measurements and shaping notes nearby as you work.
Work the cuff
Begin with the pattern’s cast-on instructions, then set up the stitches according to whether the mitten is worked in the round or flat. The sequence below keeps the cuff aligned with the pattern from its first edge.
- Cast on the specified number of stitches using the pattern’s method; keep the edge even, since a very tight cast-on can restrict the wrist opening.
- For circular construction, distribute stitches across the prescribed needles, check that the cast-on edge is not twisted, and join only when the pattern directs.
- For flat construction, work the first row as written and keep the edge stitches consistent; the pattern will specify how the cuff is later joined or seamed.
- Place a round or row marker where indicated, then follow the cuff instructions in sequence, repeating the stated rows or rounds without altering the stitch count.
- Work ribbing only when specified: alternating knit and purl columns, such as 1×1 or 2×2 rib, can draw the fabric inward and help it sit close to the wrist.
- Keep the rib pattern aligned across each round or row, checking that knit columns remain knit and purl columns remain purl rather than drifting at a join.
- Continue until the cuff reaches the length stated in the pattern, then follow its transition instructions before beginning the hand stitch pattern.
Ribbed mitten cuffs provide stretch and recovery, but the pattern’s stated cuff structure and length determine the finished opening. At the transition, retain any markers and stitch arrangements needed for the next instructions.
Shape the hand
After the cuff, work the hand in the stitch pattern specified for that section, such as stockinette or a charted motif. In seamless construction, continue around the needles; for a flat mitten, work the listed rows and turn at each edge. Keep the established direction of the fabric and follow any pattern notes about carrying a motif or maintaining edge stitches. Use the pattern’s shaping sequence exactly as written. Increases and decreases change the hand’s width or taper, and their placement matters as much as their frequency; do not substitute a different decrease or move a shaping point unless the instructions allow it. If the pattern gives a measurement from the cuff edge or a number of rounds before shaping, use that stated checkpoint rather than estimating from the fabric alone. Track each round or row with a tally, removable marker, or written note, especially when the hand includes repeated shaping intervals. Record completed repeats for the first mitten so the second can match. If working from a chart, mark the current row and confirm whether it is read from right to left or alternates direction on flat work. As the hand grows, compare its length and circumference with the intended hand measurements and the pattern’s checkpoints. If the instructions permit trying it on, pause before the upper shaping and check that the fabric reaches the intended point without pulling; otherwise, lay the work against the corresponding measurement. Follow the pattern’s tip-decrease sequence to taper the upper hand, keeping each decrease round in order. This measured progress helps custom-fit knitted mittens follow the wearer’s proportions without changing the pattern’s stitch count.
Making the Thumb
The thumb may be formed from stitches held while you knit the hand, from a shaped gusset, or from a combination specified by the pattern. These construction choices determine where the opening sits and how its stitches are arranged. Follow the pattern for placement, counts, and increase or decrease rounds; small changes can alter the thumb’s angle and fit. Once the hand is complete, return to the marked opening and work the thumb in the round unless the instructions say otherwise.
Set aside or shape thumb stitches
A thumb opening made with held stitches keeps a group of stitches live while the hand continues. A gusset gradually adds stitches beside the thumb, creating extra fabric at its base before some or all of those stitches are held. Both methods leave an opening to work later, but their placement and shaping differ; the pattern’s stitch counts and markers determine where each step belongs.
| Construction | Stitch placement | Shaping effect | Pattern detail to follow |
|---|---|---|---|
| Simple thumb opening | Thumb stitches are transferred to waste yarn or a holder during hand construction. | The held group creates a direct opening, with little or no added fabric at the base. | Use the stated stitch count and position, then follow any instructions for casting on stitches across the gap. |
| Thumb gusset | Increases are worked beside the thumb area, commonly on both sides of a marked group. | The added stitches widen the base and shape the thumb’s angle; the gusset stitches are later held or worked separately. | Place markers and work increase rounds exactly where directed; patterns differ in their increase rate and final count. |
| Gusset with held stitches | Gusset stitches are set aside after the prescribed increases, sometimes with additional stitches at the opening. | The increased fabric provides room at the thumb joint while held stitches form the thumb base. | Keep the gusset count, held-stitch count, and any cast-on bridge distinct as written in the pattern. |
For knitting mitten thumbs, avoid substituting one construction for another: a gusset changes both the hand’s stitch count and the thumb’s position. Mark the opening with a removable marker or waste yarn, and record which stitches are live so they can be returned accurately.
Finish the thumb
When the hand is complete, transfer the held thumb stitches back to double-pointed needles or a circular needle suited to the small circumference. If the pattern directs, pick up stitches along the opening and work any cast-on bridge stitches; picking up one or two at a gap is common, but use the pattern’s count to avoid tightening or distorting the base. Arrange the stitches evenly across the needles and join to work in rounds, taking care not to twist them. Work the thumb until it reaches the length specified by the pattern or the wearer’s thumb measurement. Try on the mitten before beginning the tip decreases: the fabric should reach near the thumb tip without pulling at the web between thumb and hand, and the thumb should bend comfortably. Follow the prescribed decrease placement and rate to shape the tip; decreases commonly narrow the circumference over successive rounds, but their timing varies by design. Cut the yarn with a tail, thread it through the remaining stitches, draw the opening closed, and secure it on the inside.
Finishing and Fit Checks
Finishing turns the knitted fabric into a wearable pair, while a careful fit check catches differences that are easy to miss on the needles. Follow the pattern’s method for closing both the mitten and thumb, since the final stitches and construction vary. Keep yarn tails secure on the wrong side without tightening the fabric or adding a bulky ridge. Then compare the finished measurements, movement, and comfort with the pattern and with the second mitten.
Secure and weave in ends
Close the mitten top and thumb exactly as the pattern directs. Depending on the instructions, that may mean drawing the yarn through the remaining stitches, grafting live stitches, or completing a specified bind-off. Use the same closing method at the thumb tip if the pattern calls for one; do not substitute a seam or bind-off that changes the shape.
Before weaving in the tails, check that no live stitches have slipped and that the closing stitches sit evenly. Thread each yarn end onto a tapestry needle and work it along the wrong side, following the path of nearby stitches or passing through several purl bumps. Change direction once or twice over a short distance so the tail is held securely rather than relying on a single pass.
Keep the yarn relaxed as you weave: pulling it tight can pucker the crown or narrow the thumb opening. For a smooth finish, distribute the tail through the fabric instead of knotting it or carrying it across the inside as a long strand. Trim close only after the end is secure, leaving enough yarn to avoid cutting into the knitted stitches.
Check the finished fit
Compare the finished mitten with the pattern’s stated measurements before deciding whether it fits as intended. Try it on with the hand relaxed, then move the fingers and thumb through their normal range.
- Measure the mitten’s hand width and length as directed by the pattern, and compare those figures with its finished dimensions rather than relying on the flat appearance alone.
- Check the finger area with your fingers straight and gently bent; the fabric should allow movement without pulling tight across the knuckles or leaving excess fabric at the tip.
- Move the thumb in and out, then bend it across the palm. Confirm that the thumb tube and its base do not twist, bind, or tug the hand fabric.
- Pull the cuff over the wrist and check that it stays in place without uncomfortable pressure; the edge should not gap when you turn your hand.
- Flex your hand several times and make a loose fist. Look for tension lines across the palm, thumb base, and crown that appear only during movement.
- Lay the second mitten beside the first and compare hand length, cuff length, thumb placement, and overall width; check both on the same hand if possible.
Small differences can come from finishing tension, so compare the pair in the same position and use the pattern measurements as the reference. A matching pair should feel equally comfortable and allow the same range of movement.
Common Problems and Fixes
When a mitten starts to look wrong, pause before ripping back or changing the stitch count: compare the pattern instructions for your size, the stated gauge, and your hand measurements with the work on the needles. Check the exact row or round where the issue appears, since a small difference in circumference, length, or shaping can become more noticeable near the palm or thumb. For knitting mittens in the round, also inspect the fabric where needle changes occur; a visible ladder there may be a tension issue rather than a pattern-count error.
Uneven tension often shows as alternating loose and tight columns, loose loops between needles, or a visibly different fabric where you switch from knit to purl stitches. Spread the stitches evenly along the needles and avoid pulling the first stitch of each new needle unusually tight, which can create a tight stripe beside looser stitches. If a single loop is oversized, use the needle tip to gently redistribute its slack across neighboring stitches instead of tightening only that loop. Compare several rounds in good light before deciding whether the variation continues; one isolated loose stitch usually does not require reworking a whole section.
If the mitten measures differently from the pattern gauge, count stitches and rows over a measured 4-inch (10 cm) area of the actual fabric, away from the cast-on edge and any shaped section. More stitches per 4 inches than the pattern specifies means the stitches are smaller; fewer means they are larger. Check the pattern’s gauge instructions and your measurements before making any stitch-count change, since changing needle size may correct the fabric dimensions while preserving the pattern’s intended shaping. If you do adjust needles, knit a fresh sample and remeasure rather than assuming the next size will produce the exact gauge.
A tight cuff can come from a restrictive cast-on edge even when the ribbing itself stretches comfortably. Test the cast-on around the hand at the point it must pass over, and compare that opening with the pattern’s stated cuff circumference; if the edge alone resists, redo it with a stretchier cast-on suited to ribbing rather than adding stitches throughout the mitten. If the ribbing is tight across its full depth, check the gauge and the pattern’s stitch count before changing the number of stitches, because extra stitches can distort the transition into the hand.
When the pair differs, lay both mittens flat and compare cuff depth, hand length, width, thumb placement, and decrease rounds against the pattern and against each other. Differences often come from switching needle size, knitting at a different pace, or measuring one mitten while it is stretched; use the same surface and relaxed state for both checks. If one is longer by a few rounds, matching the other’s round count may be enough, but correct a repeated gauge difference before proceeding. Keep brief notes on needle size and round counts so the second mitten follows the first rather than relying on memory.