
Start with the Knitting Basics
Hand Knitting Guide is an independent English-language information guide to hand knitting, from the first loops to a finished piece. Knitting basics for beginners make more sense when yarn, needles, gauge, stitches, and pattern directions are treated as connected choices. A small change in needle size can alter the fabric, while a different stitch structure can change its texture and stretch. The focused guides provide a practical progression from selecting tools to planning a project. Start with the connections between materials and instructions, then use each guide to practise one decision at a time.
How Yarn, Needles, Gauge, and Patterns Connect
Yarn weight describes how thick a yarn is, and that thickness affects the scale and density of the knitted fabric. A medium-weight yarn, often labelled category 4, is commonly paired with needles around 4.5–5.5 mm, though the yarn label and pattern may suggest a different range. With the same yarn, smaller needles generally produce a denser fabric and larger needles a more open one. The result also depends on how tightly each knitter forms loops, so the needle size alone cannot guarantee a particular fabric.
Gauge records the number of stitches and rows in a measured area, commonly a 10 by 10 cm (4 by 4 in) square. A pattern might specify 18 stitches and 24 rows over that area in a particular stitch pattern. If a swatch has more stitches than the stated gauge, the stitches are smaller; if it has fewer, they are larger. Row gauge matters too when a project’s length is set by a row count rather than a measured dimension. Follow the pattern’s instructions about washing or blocking a swatch before measuring, since finishing can change its dimensions.
A pattern combines gauge with stitch instructions and finished measurements to describe how much fabric to make. Its stitch count establishes the width at the stated gauge, while row counts or length measurements help determine the height. Instructions tell you how to form and arrange stitches, and shaping directions change their number when the fabric needs to narrow or widen. When the gauge differs, a piece can turn out larger or smaller than its listed dimensions even if every instruction is followed. Checking the gauge before beginning helps you decide whether the yarn and needle combination can produce the intended size and fabric.
From Stitches to Finished Fabric
A stitch is a loop of yarn held on a needle; knitting forms a new loop through an existing one while keeping the earlier loops available to work. Casting on creates the first row of loops, and each completed row transfers loops from one needle to the other. Repeating these actions builds connected rows of interlocking loops rather than a set of separate knots. The live loops still on the needle form the unfinished edge, while the rows below them make up the growing fabric.
Knit and purl actions make different shapes on the fabric’s surface. A knit stitch usually appears as a small V on the side facing the knitter, while a purl stitch shows a rounded bump there; viewed from the other side, their appearances reverse. Repeating or combining the two actions creates different textures and affects how the fabric stretches. For example, a row made with knit stitches has a different look and feel from fabric that alternates knit and purl actions. The stitch sequence determines what you see, not simply the yarn colour.
Fabric has a front and a back, although some patterns make both sides look alike and others have a distinct right side. Stitch choices also influence whether the fabric lies flat, stretches readily, or pulls inward at its edges. A simple swatch makes these qualities visible: look at both faces, gently stretch it across and along the rows, and notice whether it returns to shape. The repeated loops are the basic building blocks; their arrangement determines the finished fabric’s surface, movement, and edge behaviour.
A Route Through the Beginner Guides
Follow these guides in order, using a small swatch to connect early practice with later project decisions.
- Start with needle selection to decide which needle type, material, and size suits your yarn and the way you prefer to hold and work it.
- Repeated knit and purl actions create different surfaces; practise these foundational stitch structures before adding shaping or complicated pattern repeats.
- Use the gauge and pattern connection to check a measured swatch against the pattern’s stitch count, row count, and finished dimensions.
- Compare beginner project forms to choose a shape that fits your current skills, such as a flat piece worked in rows or a tube worked in the round.
- Move on to first-blanket planning to settle on a manageable size and stitch choice, then use consistent measurements to track the growing fabric.
Work through one decision at a time, and begin the project only when a swatch confirms that your yarn and needles make fabric close to the pattern’s gauge.
Choose Knitting Needles
Choosing knitting needles means balancing the tool’s construction and material with the yarn, project shape, and your hands. Needle size affects how the stitches sit and how dense or open the finished fabric becomes. Pattern recommendations and a gauge swatch give you practical reference points, while comfort matters over many rows. Compare the options below, then use the project and yarn in front of you to make a final choice.
Needle Types and Materials
Needle construction determines how stitches are held and whether the work is made in rows or a continuous round; material changes the feel of the stitches as they move.
| Option | Construction or feel | Grip, surface, and flexibility | Typical use and handling comfort |
|---|---|---|---|
| Straight needles | A pair of rigid needles with one pointed end and a stopper at the other. | The shaft material sets the grip and surface; the stopper keeps stitches from sliding off. | Common for flat pieces worked in rows, such as a narrow scarf. The projecting needle length can feel cumbersome on wide work or in a crowded lap. |
| Circular needles | Two needle tips joined by a flexible cable, available in different tip and cable lengths. | Tips may be wood, bamboo, metal, or plastic; cable flexibility affects how comfortably stitches move around the join. | Work flat by turning at the end of each row, or in the round by joining the stitches. The cable holds a broad fabric’s weight in the lap. |
| Double-pointed needles | Short needles pointed at both ends, commonly used as a set of four or five. | Material affects grip and sliding; the small diameter can take practice to hold securely. | Useful for small circumferences, including sock toes and sleeves, when a circular needle is too long to work comfortably. |
| Bamboo | A lightweight natural material with a warm feel. | Usually has more grip than smooth metal and some natural flex; surface finish varies by needle. | Stitches are less likely to slide freely, which can suit knitters who prefer controlled handling or a lighter tool. |
| Other wood | Often polished, with weight and firmness varying by wood and design. | Typically offers more grip than metal; a polished surface may still let stitches move smoothly. | A warm-feeling option for steady handling, though individual needles differ in weight and surface finish. |
| Metal | Firm tips, commonly made from aluminum or steel. | Usually smooth and inflexible, so stitches glide quickly; the lower grip may feel slippery to some hands. | Can suit fast, even movement and firm handling. The cool, smooth surface may be less comfortable for knitters who prefer more resistance. |
| Plastic | Lightweight needles, with firmness depending on the design. | Often has some flex; smoothness and grip vary, so stitches may move more or less readily between brands. | Low weight can feel comfortable during longer sessions. Check that the shaft is firm enough for the project and does not bend more than you prefer. |
For a first pair, try the needle in your hands if possible: a comfortable grip and predictable stitch movement matter more than choosing a material by name alone.
Match Needle Size to Yarn and Project
Start with the needle size recommended by the pattern, then check the yarn label for its suggested range. These are useful starting points, not guarantees: the same yarn can produce a tighter or looser fabric depending on the knitter and needle material. Yarn weights help narrow the options, but the intended fabric—dense, drapey, or open—also affects the choice. A larger needle generally creates more room between stitches, while a smaller one tends to make a firmer fabric.
Make a gauge swatch using the stitch pattern and yarn specified for the project. Measure stitches across the center of the swatch and compare the count with the pattern’s gauge; if you have more stitches per 10 cm (4 in), try a larger needle, and if you have fewer, try a smaller one. Re-swatch after changing size, because a small adjustment can noticeably change the fabric’s drape and dimensions. For items that must fit or meet stated measurements, use the needle size that gives the required gauge rather than relying on the label alone.
Project construction helps determine the needle form and length. Circular needles can hold flat work as well as round work: for flat knitting, turn the piece at each row end instead of joining it. Their cable supports a large number of stitches, while double-pointed needles suit small circumferences. Hand comfort is another practical check; if stitches feel cramped, the cable is taut, or the tips feel slippery, try a different length, material, or size while keeping the pattern’s gauge goal in view. For a reliable choice, begin with the pattern recommendation and let a measured swatch confirm the size.
Basic Stitch Structures
Four structures shape much of beginner knitting: the knit stitch, the purl stitch, stockinette, and ribbing. A single stitch has a distinct face and reverse, and the way those faces meet determines the texture of the fabric. Repeating stitches in rows or columns creates recognizable patterns, from smooth V-shaped loops to elastic ridges. Identifying these surfaces makes clear how a small set of movements produces different fabrics.
Knit and Purl Stitches
Knit and purl are the two basic knitting stitches, and each creates a loop that remains on the needle while a new loop is pulled through it. The difference is where the working yarn sits and how the needle enters the existing stitch. Together, these movements form the visible textures used in many knitted fabrics.
For a knit stitch, hold the working yarn behind the fabric and bring the right needle into the next stitch from front to back. Wrap the yarn around the needle, draw a new loop through, then let the old loop slide off the left needle.
- Keep the yarn behind the work for a knit stitch; the right needle passes through the front of the next loop before drawing yarn through.
- After wrapping the yarn around the right needle, pull the new loop through the old one and release that old loop from the left needle.
- For a purl stitch, bring the working yarn to the front, insert the right needle into the next loop, wrap yarn, and draw through.
- A knit stitch looks like a small V on the side facing you; its reverse shows a rounded horizontal bump beneath the loop.
- A purl stitch shows a rounded bump on the front and a V-shaped loop on the reverse, the same structure viewed from the other side.
That front-and-back relationship explains why a row of knit stitches looks different depending on which side faces outward. When you knit one row and purl the next, the same side presents V-shaped loops while the opposite side presents bumps. A knit stitch on one face is the reverse of a purl stitch on the other, so these are not unrelated building blocks but two views of the same loop structure. For practice, alternate a short row of knits with a row of purls and compare both faces of the swatch.
Stockinette and Ribbing
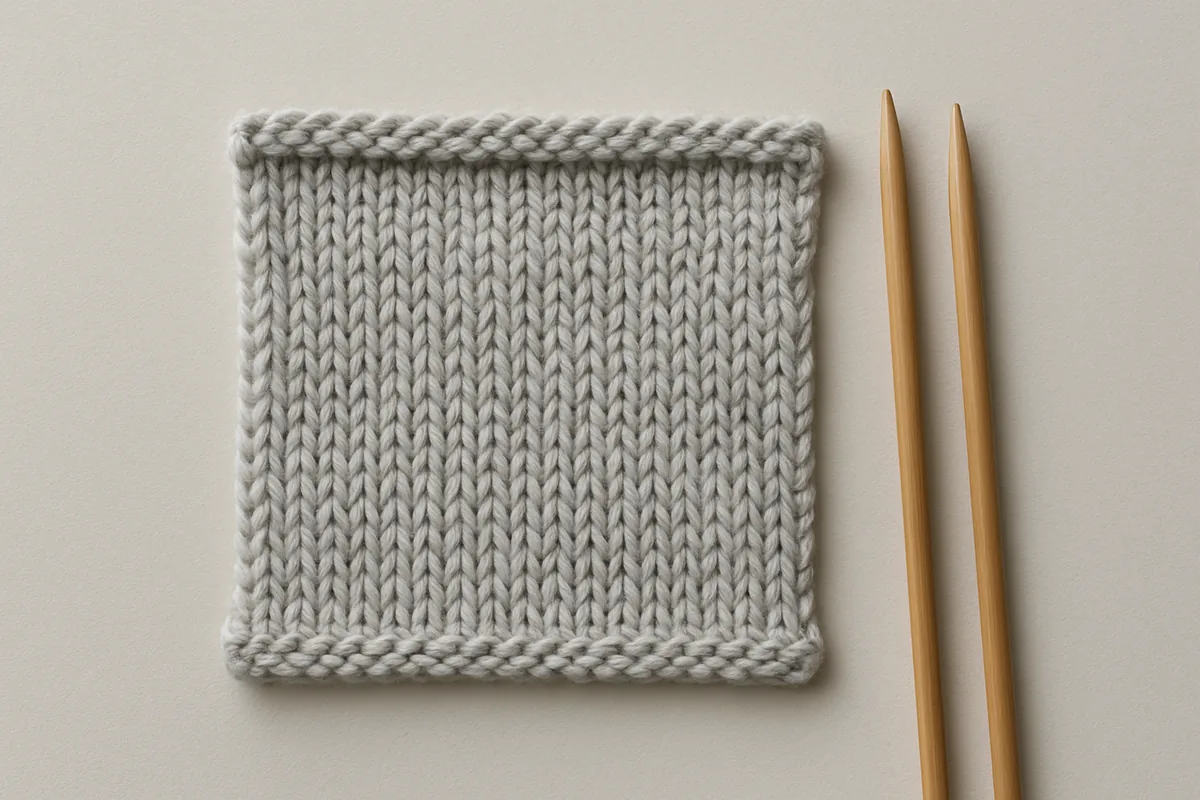
Stockinette forms when knit stitches appear across one side of the fabric and purl stitches across the other. In flat knitting, that means knitting every stitch on the right-side rows and purling every stitch on the wrong-side rows. The right side has orderly columns of V-shaped loops; the reverse has horizontal bumps. When stockinette is worked in the round, knit every round to keep the V-shaped face on the outside.
Stockinette tends to curl at its edges: the lower edge rolls toward the knit face, while side edges roll toward the purl face. The stitch structure pulls unevenly in those directions, so an unframed stockinette swatch rarely lies flat. Its smooth surface is common in garment panels and other areas where a clear, even field of V-shaped stitches is wanted. The bumpy reverse remains visible if the fabric is turned over, so stockinette does not look identical on both sides.
Ribbing alternates knit and purl stitches within the same row, then stacks those stitches into vertical columns. In 1×1 ribbing, one knit stitch alternates with one purl; 2×2 ribbing groups two of each. The knit columns stand out while the purl columns recede, creating raised ribs and folds. Because the columns can draw together and spread apart, ribbing stretches across its width and returns toward its original shape. Its two faces have a similar ribbed appearance, making it more reversible than stockinette. Cuffs, neckbands, and hems often use ribbing to fit closely. For a first swatch, work a few rows of each structure and compare the smooth V-shaped face, the bumpy reverse, and ribbing’s side-to-side stretch.
Compare Beginner Projects
Beginner knitting projects differ in more than size: each form asks you to manage a particular construction method, level of shaping, and finish. A flat rectangle lets you focus on steady back-and-forth rows, while a hat may add circular work and decreases. A dishcloth offers a compact way to practise a small pattern repeat; a blanket extends that work across a larger piece. Choose by the skills you want to practise and by the exact requirements of the pattern.
Project Forms and Their Skills
Project shape is a useful first comparison when choosing a project. The table shows common formats, their usual construction, and the work each one gives you to practise.
| Project | Construction and shaping | Skills practised | Finishing and practice |
|---|---|---|---|
| Scarf | Usually one flat rectangle worked back and forth; shaping is typically absent. | Consistent rows, maintaining edge stitches, and following a simple stitch repeat. | Usually 2 short ends to weave in; long rows give repeated practice keeping the fabric even. |
| Dishcloth | Usually one small flat square or rectangle, worked in rows. | Repeating a short sequence and keeping track of a compact pattern. | Often 2 ends to weave in; a small format lets you complete and inspect the fabric quickly. |
| Hat | Worked in the round as a tube, or flat and seamed; decreases shape the crown. | Joining or seaming, tracking rounds, and following shaping instructions. | Requires crown shaping and finishing at the top; construction varies noticeably between patterns. |
| Blanket | Often one large flat panel; some patterns join multiple smaller pieces. | Maintaining a consistent pattern across many rows or keeping repeated pieces alike. | May involve a long edge finish or joining; the larger fabric calls for sustained attention. |
A scarf or dishcloth keeps construction simple, but the practice differs: a scarf gives more repetitions, while a dishcloth makes a short repeat easier to review. An easy scarf knitting pattern is a practical choice when the goal is to settle into back-and-forth rows.
Hats bring more construction decisions, especially whether the pattern works in the round or flat before seaming. Blankets generally avoid complex shaping, yet their size or multiple-piece construction can make consistency and finishing the main demands.
Choose a Project by Construction
Start with the action you want to practise, then check that the pattern actually includes it. For steadier rows, choose a flat piece with a clear repeat and few changes in its instructions. A pattern that changes stitch counts, introduces shaping, or alternates sections demands more attention than one worked the same way from beginning to end.
If your goal is working in the round, look for explicit instructions for joining the work and continuing in rounds; a hat pattern may use this construction, but some hats are knitted flat and seamed. For shaping practice, check for increases or decreases and identify where the pattern places them. The project name alone does not tell you which skills you will need.
Before casting on, scan the full pattern for construction terms, abbreviations, repeated sections, and finishing steps. Confirm that you can follow its stated stitch pattern and that any required methods are familiar enough to attempt. A short pattern with a small number of steps can still be challenging if it combines round work and shaping, while a longer flat project may repeat the same sequence throughout. Reading a knitting pattern from the start helps reveal those demands before the work is underway.
Choose the simplest pattern that contains the specific skill you want to practise; that keeps practice focused while giving you a clear next step.
Plan a First Blanket
A first blanket is a useful way to practise steady knitting over a larger piece of fabric. Before casting on, choose dimensions that suit the person and purpose, then check how the pattern’s gauge and instructions shape the finished size. A straightforward stitch pattern makes it easier to keep track of rows and spot changes in the fabric. Regular checks while you work help the blanket stay even and make finishing more manageable.
Dimensions and Stitch Choice
Start with the blanket’s intended use and recipient. A lap blanket may be around 36 by 48 inches, while a sofa throw is often about 50 by 60 inches; these are useful planning points, not fixed standards. For a bed blanket, consider the mattress size and whether you want the fabric to cover the sides. A blanket for a small child may need less width and length than an adult throw, so decide on the finished measurements before estimating how much yarn to buy.
The pattern gauge shows how its stitch count and row count translate into those measurements. For example, if a pattern gives 18 stitches over 4 inches, a 40-inch width works out to about 180 stitches before any edge treatment. A different gauge changes the width produced by the same number of stitches; row gauge similarly affects length. Follow the pattern’s stated gauge and construction instructions, since they guide both finished dimensions and how the blanket is shaped.
For a first large project, a simple, consistent stitch pattern can make progress easier to monitor. Garter stitch, for example, uses knit stitches on every row and creates a reversible fabric, while a repeating texture can provide a clear visual rhythm. Choose a pattern whose repeat is easy to track across the blanket’s width. Complicated shaping or frequent stitch changes can make a large project harder to measure and keep uniform. A clear repeat and practical dimensions give you straightforward targets as you work.
Work Evenly and Finish the Blanket
Use a few checkpoints throughout the project to catch differences before they affect the whole blanket. These checks also make finishing easier when the last row is complete.
- Confirm the cast-on count: Count the stitches after casting on and compare them with the pattern, including any stitches reserved for borders or pattern repeats.
- Check row consistency: Keep track of completed rows with a counter or written tally, especially when the stitch pattern changes after a set number of rows.
- Watch the edges: Check the first and last stitch of each row so the sides remain straight rather than gaining or losing stitches over time.
- Measure progress: Lay the blanket flat and measure from the cast-on edge at regular intervals, such as every 6 to 10 inches, against the planned length.
- Compare width and fabric: If the sides pull inward or flare, pause and compare the current width with the pattern gauge and intended measurement before continuing.
- Bind off consistently: Use the pattern’s bind-off method and keep its tension similar to the working rows, so the final edge does not cinch or ripple.
- Finish and block as needed: Weave yarn tails securely into the fabric; block only when the yarn and pattern support it, following the care instructions on the yarn label.
Keep the pattern’s measurements and care guidance nearby, and use them as the final reference. A steady row count, straight edges, and a relaxed bind-off are practical priorities for an even first blanket.